We can create a WSFC with member servers/nodes in different Active Directory domains or forests, the goal of this article is to create a WSFC with member servers/nodes that are not joined to an Active Directory domain in preparation for deploying a SQL Server Availability Group.
The hardware requirements for deploying a WSFC – whether the member servers/nodes are joined to an Active Directory domain or not – remain the same. All of the servers should be running Windows Server 2016 and must have the Windows Server 2016 Certified logo on the underlying hardware. And since the WSFC will be used specifically for SQL Server 2016 Availability Group, there is no requirement to use shared storage.
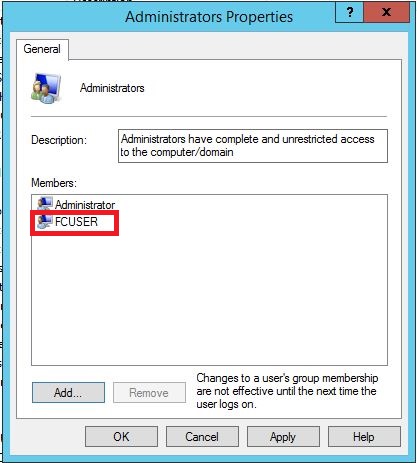
The account that you will use to create the WSFC needs to be a member of the local Administrators group – this is the same in previous versions of the Windows Server operating system. This allows us to perform the installation and configuration of the WSFC. While we can use the built-in local Administrator account, it is recommended to have a dedicated local user account specifically for this purpose. However, because there is not a centralized directory service like Active Directory for managing accounts, we will be responsible for manually managing the account on all of the member servers/nodes in our WSFC. A couple of things that you need to do: • Create a local user account on all of the member servers/nodes in the WSFC • The user name and password of the local user account must be the same on all of the member servers/nodes • Add the local user account as a member of the local Administrators group. In this example, the local user account FCUser was created. This will be used to create and manage the WSFC
• Change the Remote User Account Control (UAC) LocalAccountTokenFilterPolicy registry setting. This registry setting affects how administrator credentials are applied to remotely administer the server. Since we are using a local user account, we will be passing the credentials from one of the member servers/nodes in the WSFC to another to perform administrative tasks. We need to do this on all of the member servers/nodes in the WSFC. Open an elevated PowerShell command prompt and run the command below.
New-ItemProperty -Path HKLM:\SOFTWARE\Microsoft\Windows\CurrentVersion\Policies\System -Name LocalAccountTokenFilterPolicy -Value 1
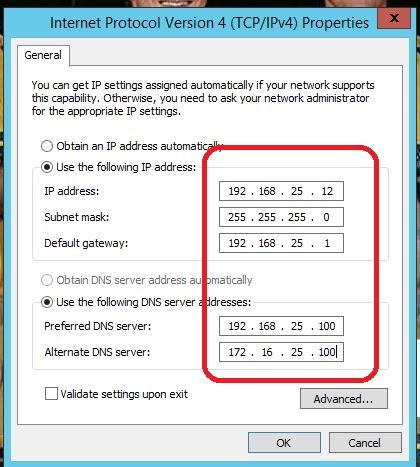
Because the WSFC will be deployed without an Active Directory CNO, it will have to rely on DNS for both the administrative and client access points. This means that the DNS can potentially become a single point of failure. We need to talk to our DNS administrators regarding the reliability and resiliency of our DNS infrastructure. In the example below, the network adapter that will be used for client connectivity is configured to have both a preferred and an alternate DNS server. This has to be done on all of the member servers/nodes in the WSFC.
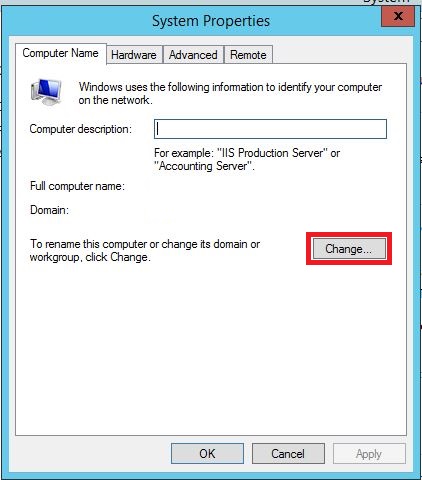
We also need to configure the primary DNS suffix for all of the member servers/nodes in the WSFC. The primary DNS suffix is used in DNS name registration and DNS name resolution. This is for every member servers/nodes in the WSFC to access each other via a fully qualified domain name (FQDN). To configure the primary DNS suffix for a server, 1. Open the System properties of the server 2. In the Computer Name tab, click the Change button.
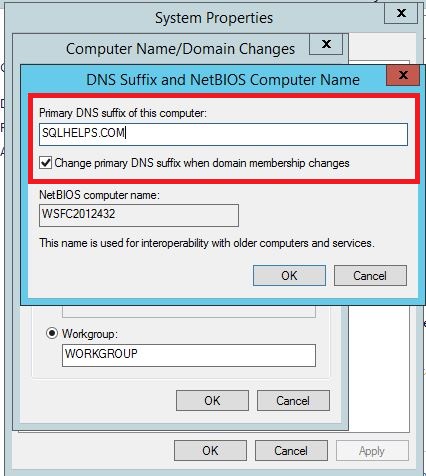
3. In the Computer Name/Domain Changes dialog box, review the network membership of the server. In the example below, the server is not a member of any Active Directory domain.
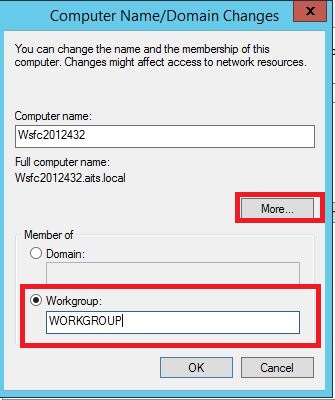
4. Click the More… button. 5. In the DNS Suffix and NetBIOS Computer Name dialog box, type the name of the DNS domain name in the Primary DNS suffix of this computer textbox. The example below uses the TESTDOMAIN.COM DNS domain name for the server.
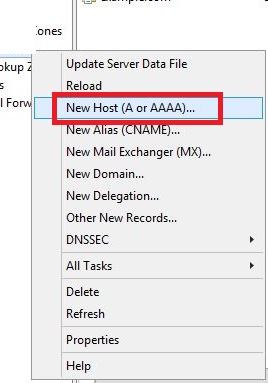
6. Click OK until all of the dialog boxes have been closed. We will be prompted to reboot the server. After configuring the primary DNS suffix on all of the member servers/nodes in the WSFC, we need to add their corresponding DNS entries. This is simply a mapping of the server host name with its IP address. We can either ask our DNS administrator to perform this task for us or we can do it our self, assuming we have administrative privileges on the DNS server. 1. To create the DNS entries on a Microsoft DNS server, open the DNS Manager administrative console. 2. Expand the Forward Lookup Zone for the DNS namespace that we used for the server’s primary DNS suffix. For this example, the Forward Lookup Zone for the DNS namespace TESTDOMAIN.COM is used. 3. Right-click on the DNS namespace and select the New Host (A or AAAA) … option
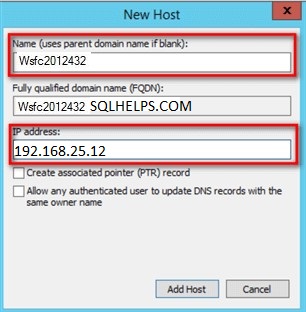
4. In the New Host dialog box, type the server hostname and its corresponding IP address. Click the Add Host button to add the DNS entry.
Alternatively, if we are doing this for testing purposes, you can use local HOSTS file to perform the IP-to-hostname mappings.
Depending on how our DNS servers are configured, we need to talk to your DNS administrators regarding DNS dynamic updates. DNS client computers can use dynamic update to register and dynamically update their resource records with a DNS server whenever changes occur. This is typically used in conjunction with a DHCP server because the IP addresses of computers change on a regular basis. Dynamic updates are performed in a secure fashion in DNS zones that are configured for Active Directory integration. This is a common configuration. However, if we don’t have an Active Directory infrastructure, the configuration might be slightly different. Below is a screenshot of how a Microsoft DNS server is configured for dynamic updates.
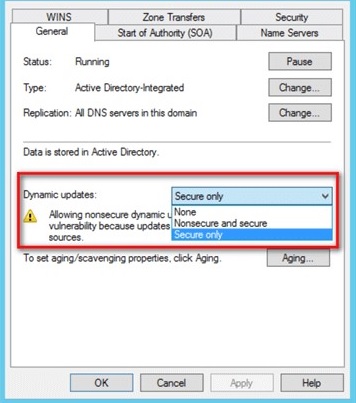
If not properly configured, the Failover Cluster Validation Wizard will fail. We can temporarily switch this to the Nonsecure and secure option prior to creating the WSFC and switch it back afterwards. The DNS-related tasks described above apply to Microsoft DNS servers. The process will be different if we are running a BIND DNS server in our network.